To setup an approver for expense reports, you will need to access the Manage Users page (only accessible to Company Owner or Admin).
To setup (or edit) your company's approval process, go to Settings > Company Settings > Manage Users.
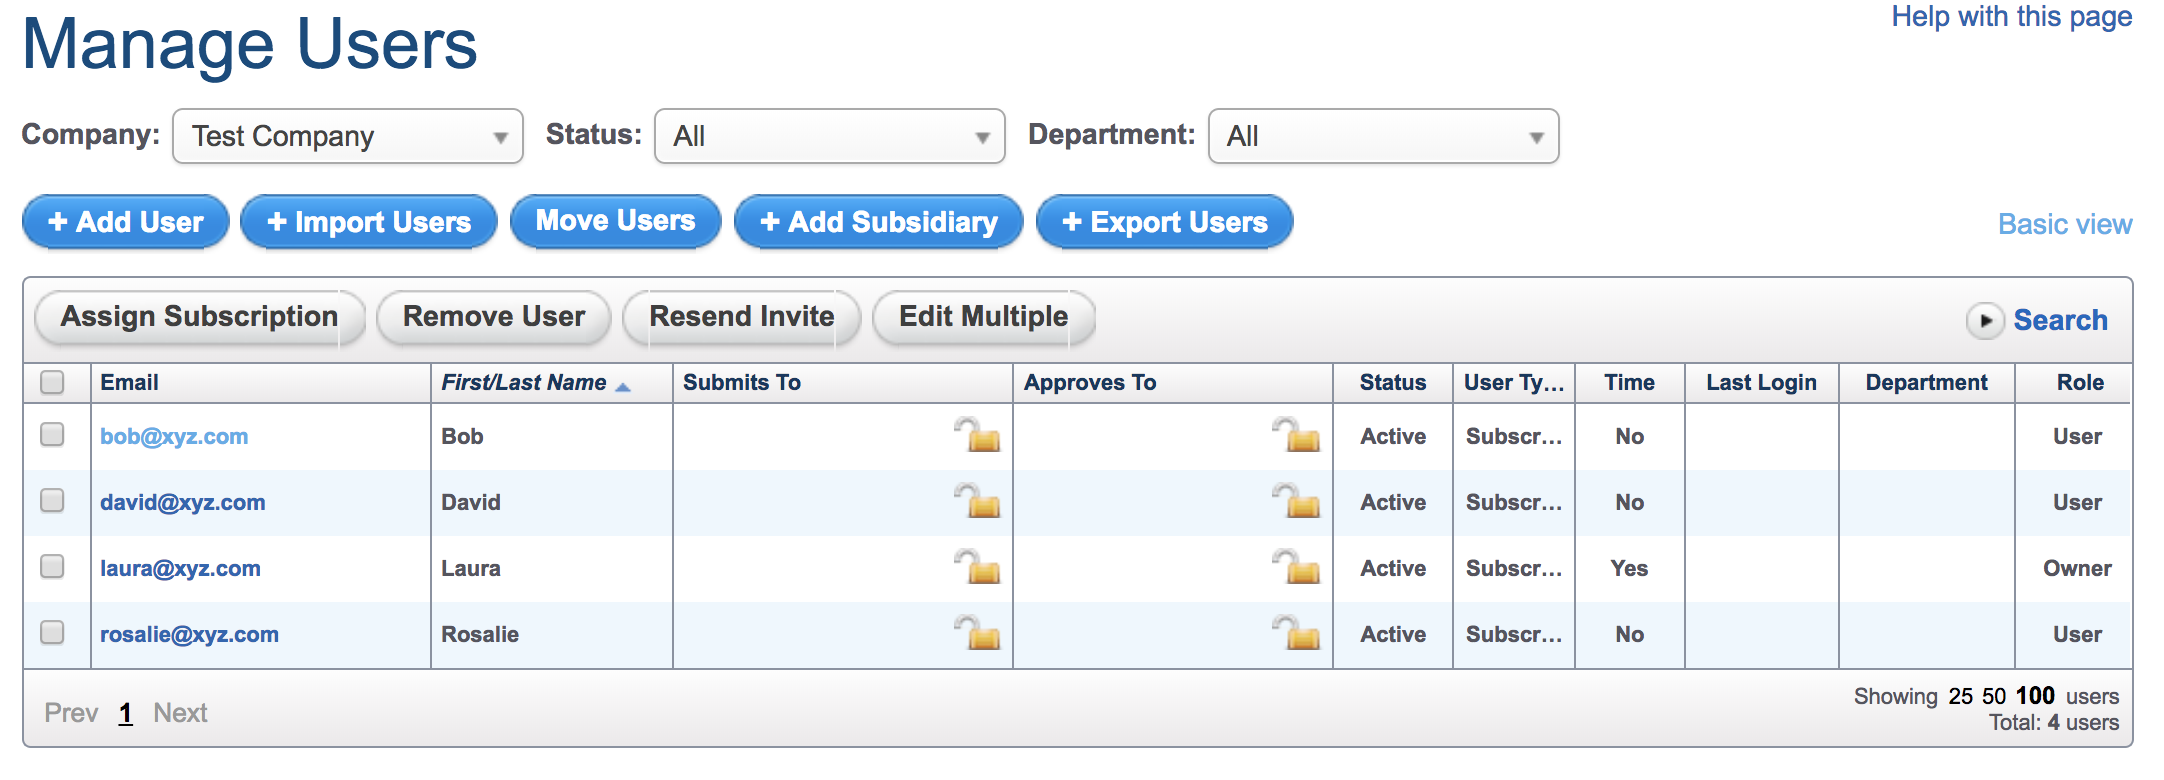
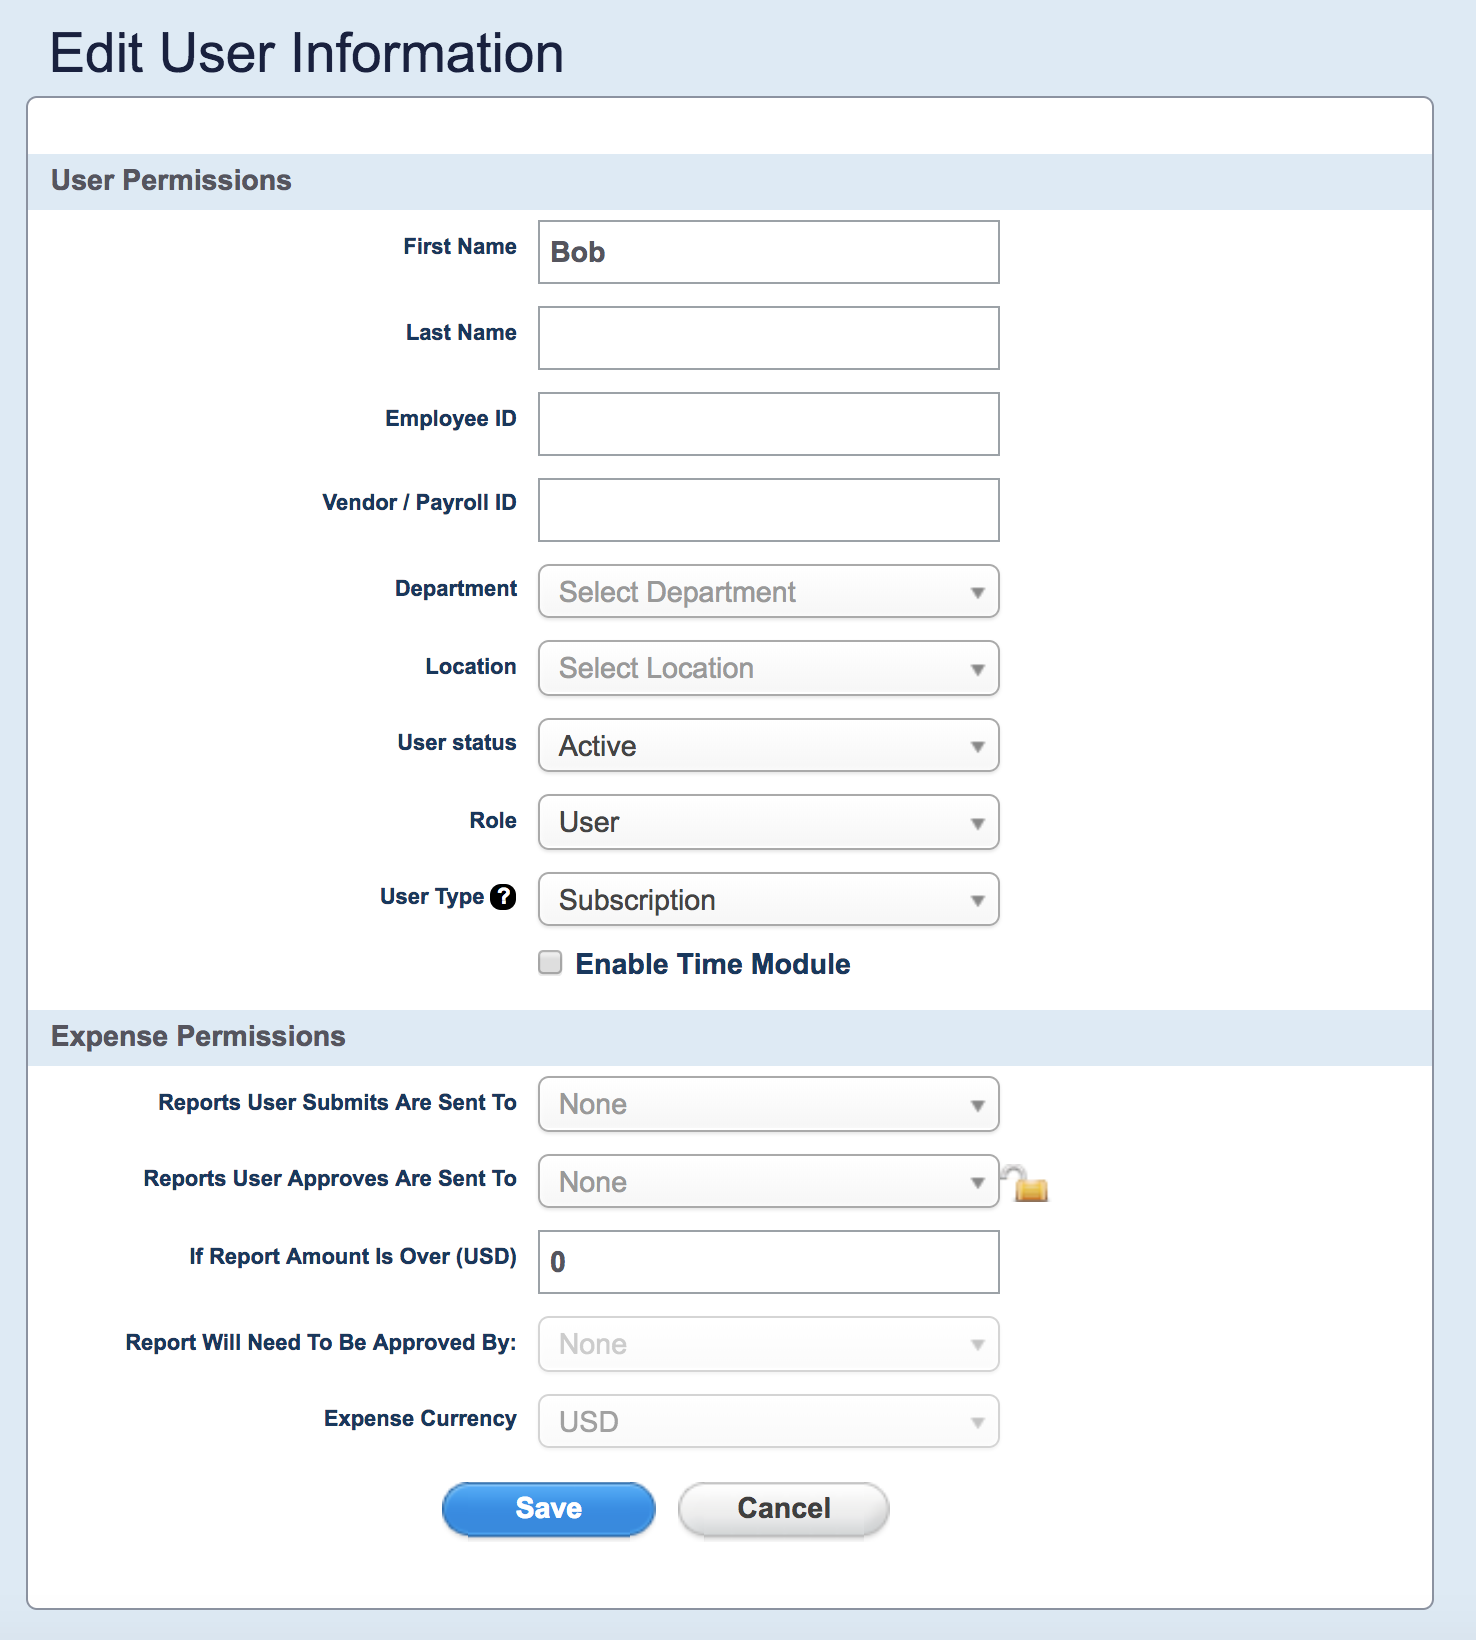
There are two places on the Manage Users page where an approver can be added. See below:
View 1 : Manage Users > Full View.
View 2 : Manage Users > Click on employees email address in blue.
How to Design your Approval Workflow
Let's imagine we have 4 users:
Bob - Sales
Rosalie - VP of Sales
David - CEO
Laura - Finance (AP)
We want the approval process to look like this:
First approver: Rosalie
Second approver: David
Final approver: Laura
The following steps will need to be followed to achieve the workflow above.
1. All reports are sent to Rosalie for first approval, in this scenario, user settings are as follows:
View 1 = Rosalie needs to be selected under the Submits To column for all users who send their reports to her.
View 2 = Rosalie needs to be selected for the field Reports User Submits Are Sent To for all users who send their reports to her.
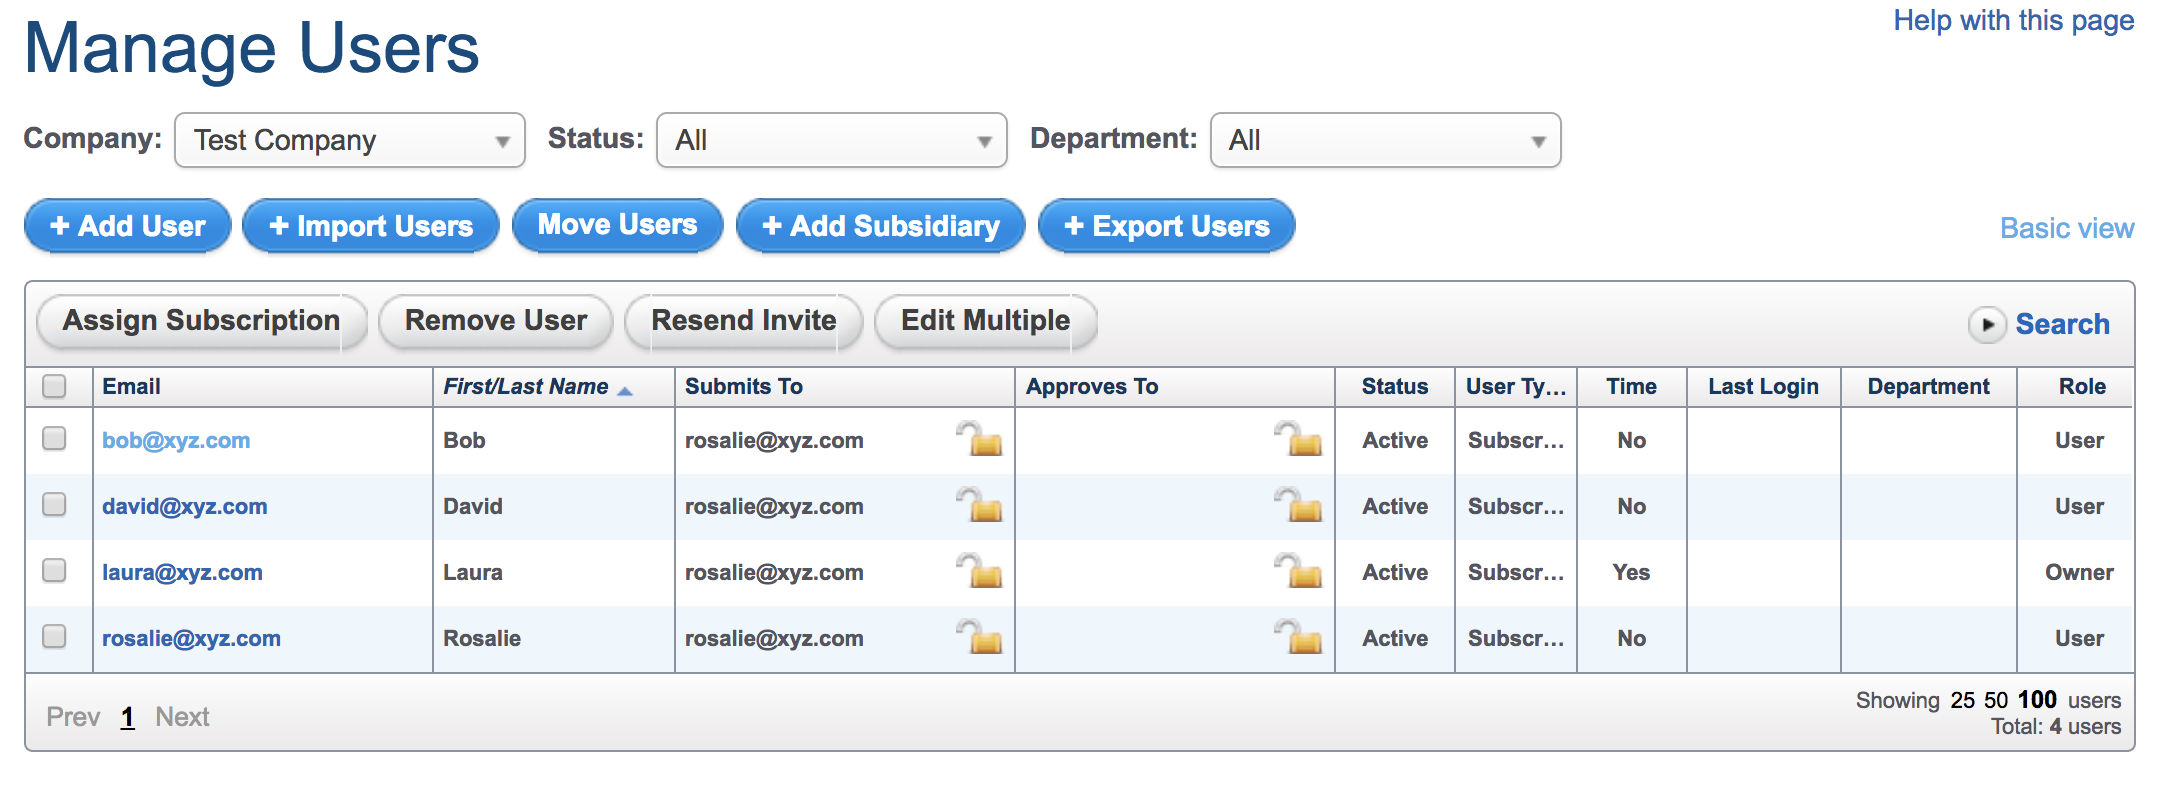
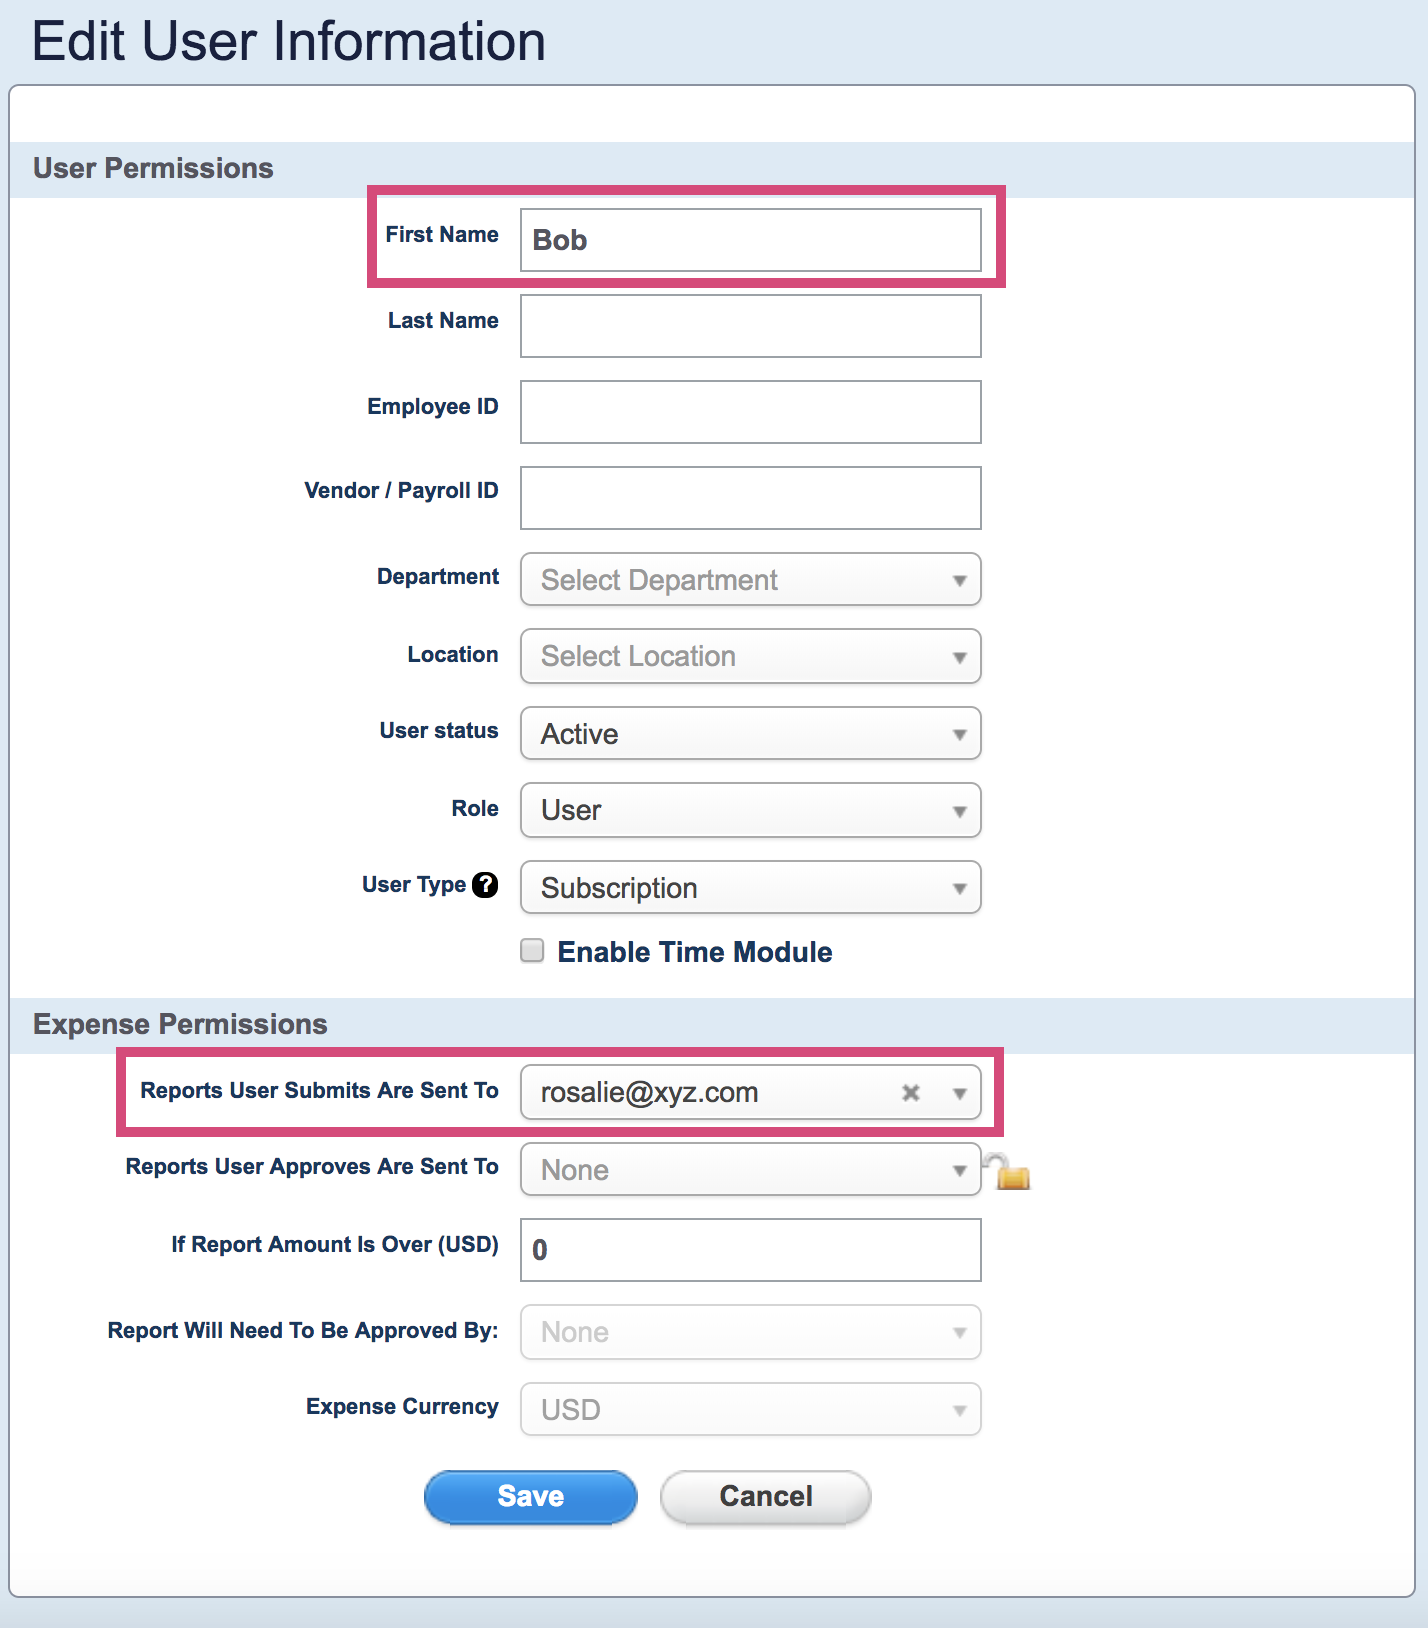
Notice Reports User Approves Are Sent To is blank for Bob because he does not approve employee expense reports.
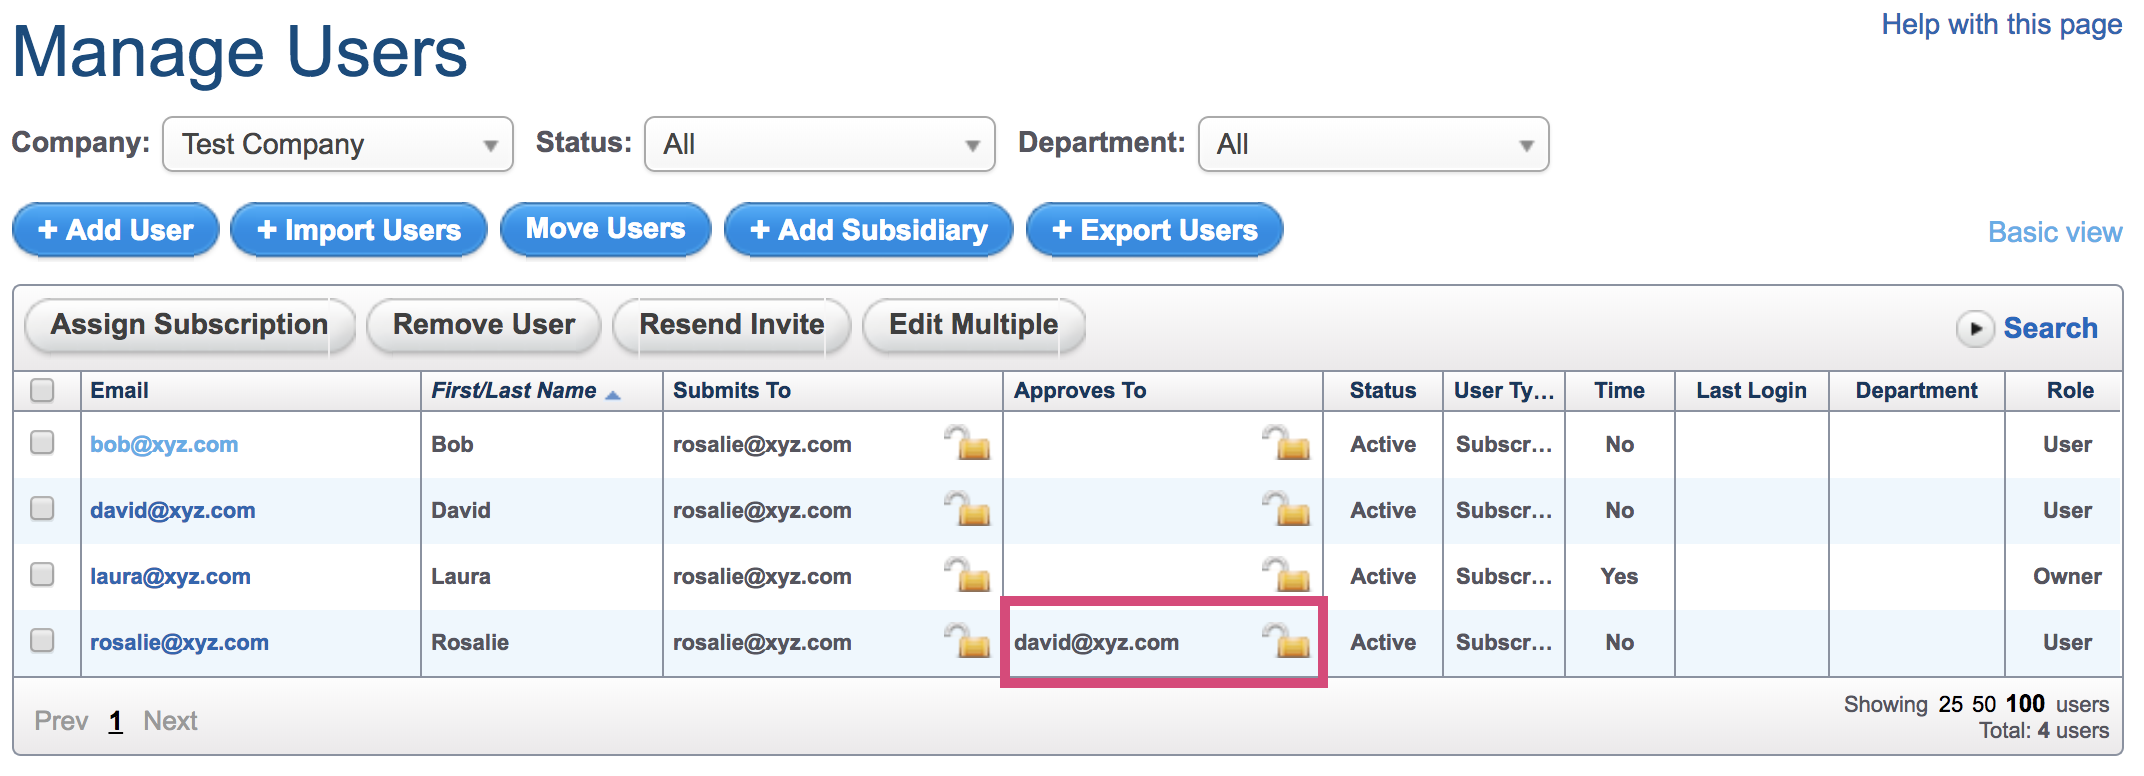
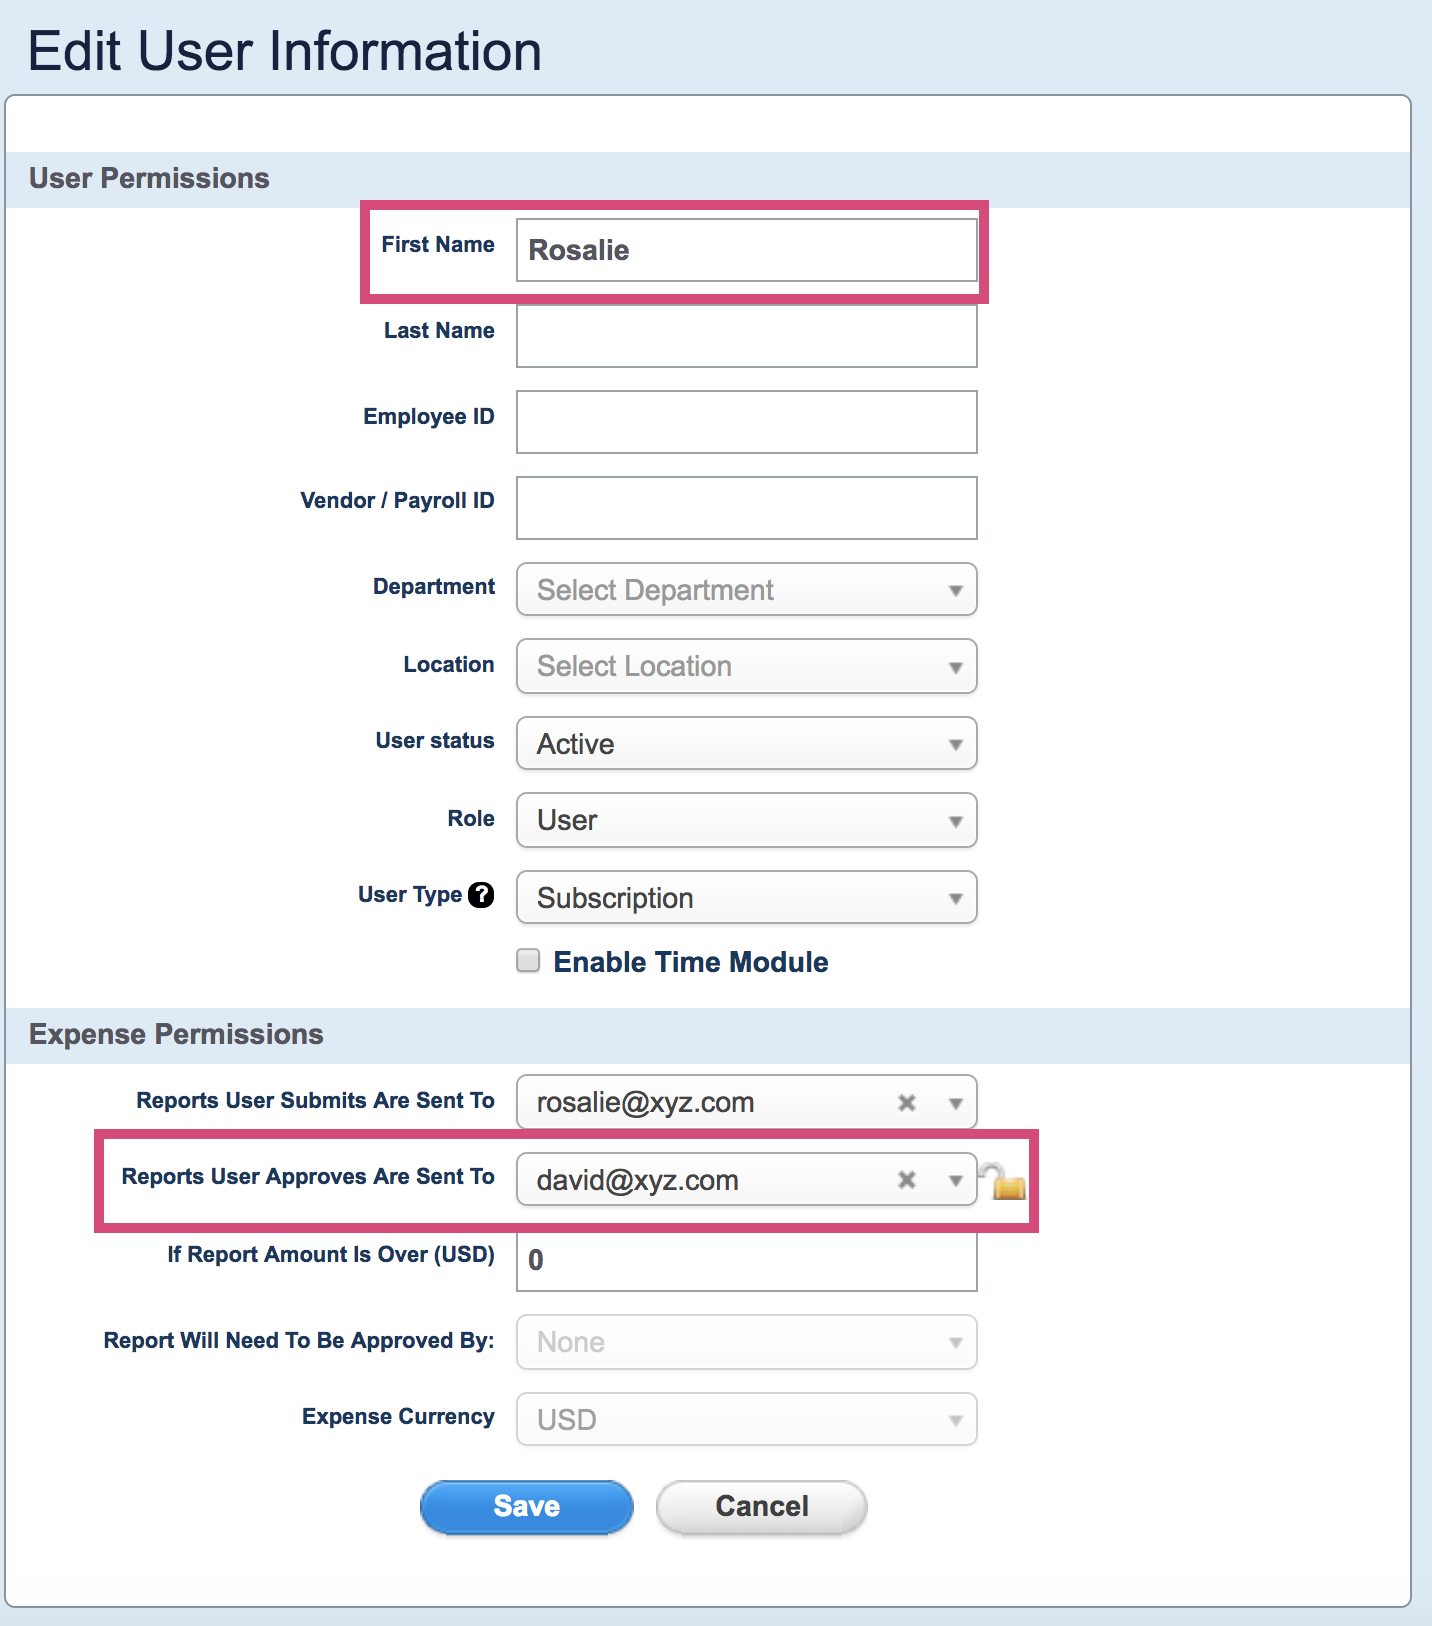
2. After Rosalie is done approving the reports, they must be sent to David next for approval. In this scenario, Rosalie's user settings are as follows:
View 1 = David needs to be selected under the Approves To column.
View 2 = David needs to be selected for the field Reports User Approves Are Sent To.
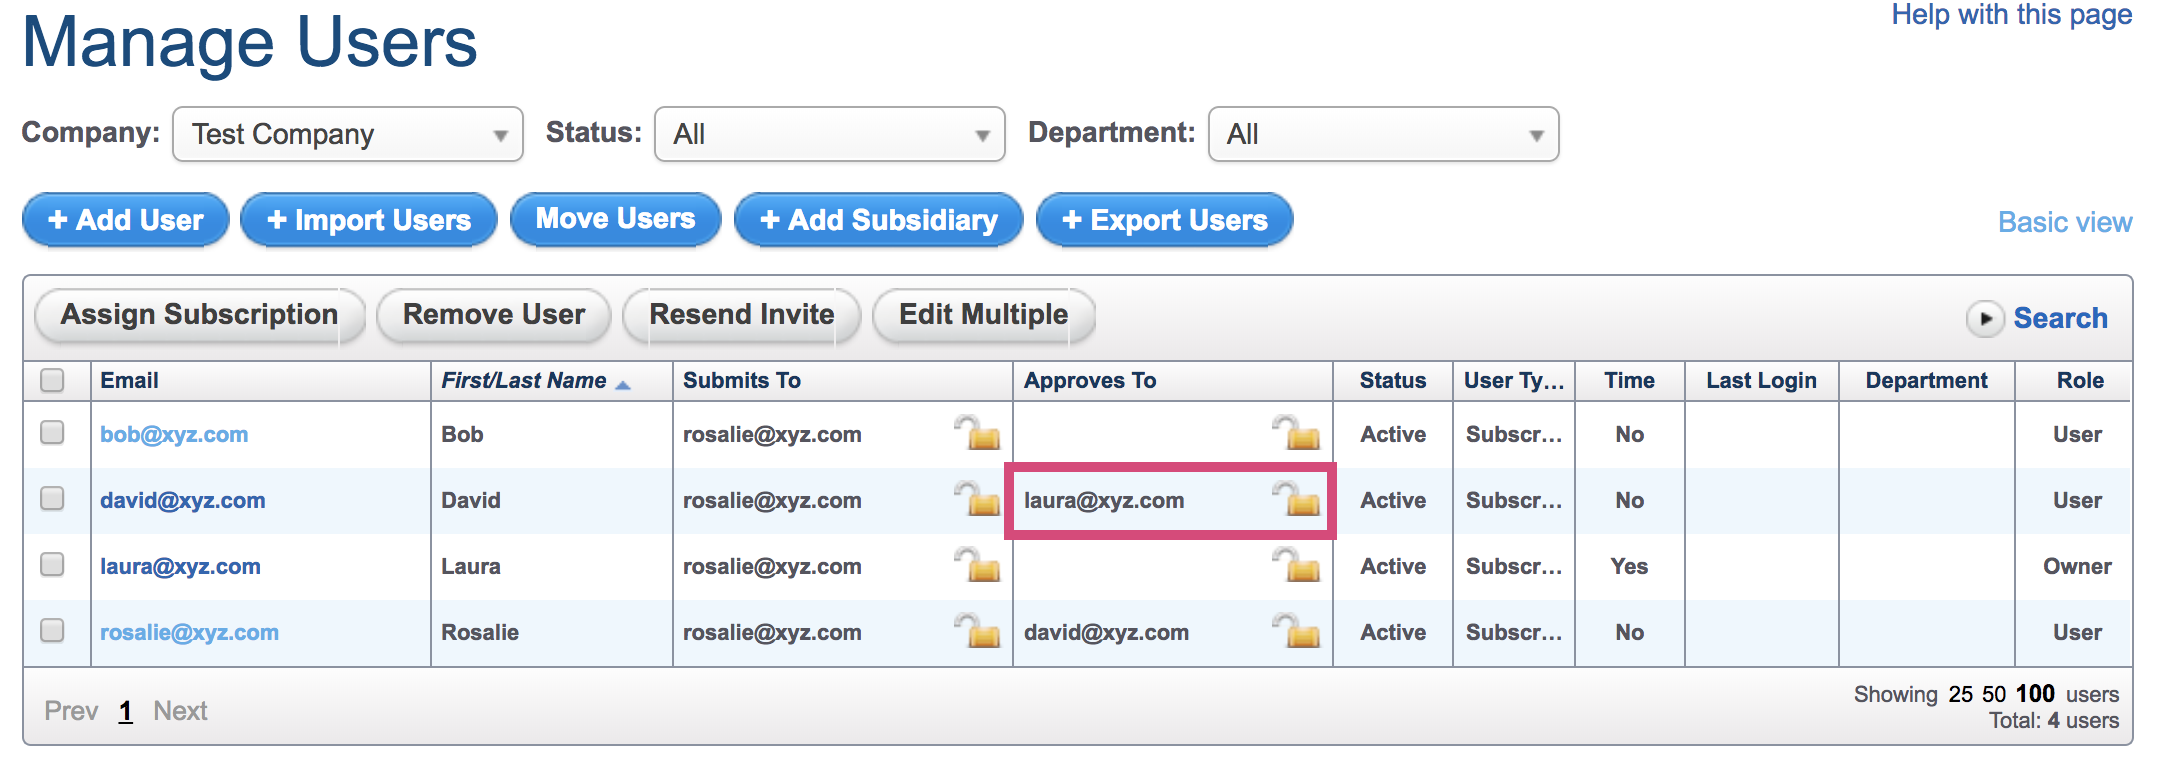
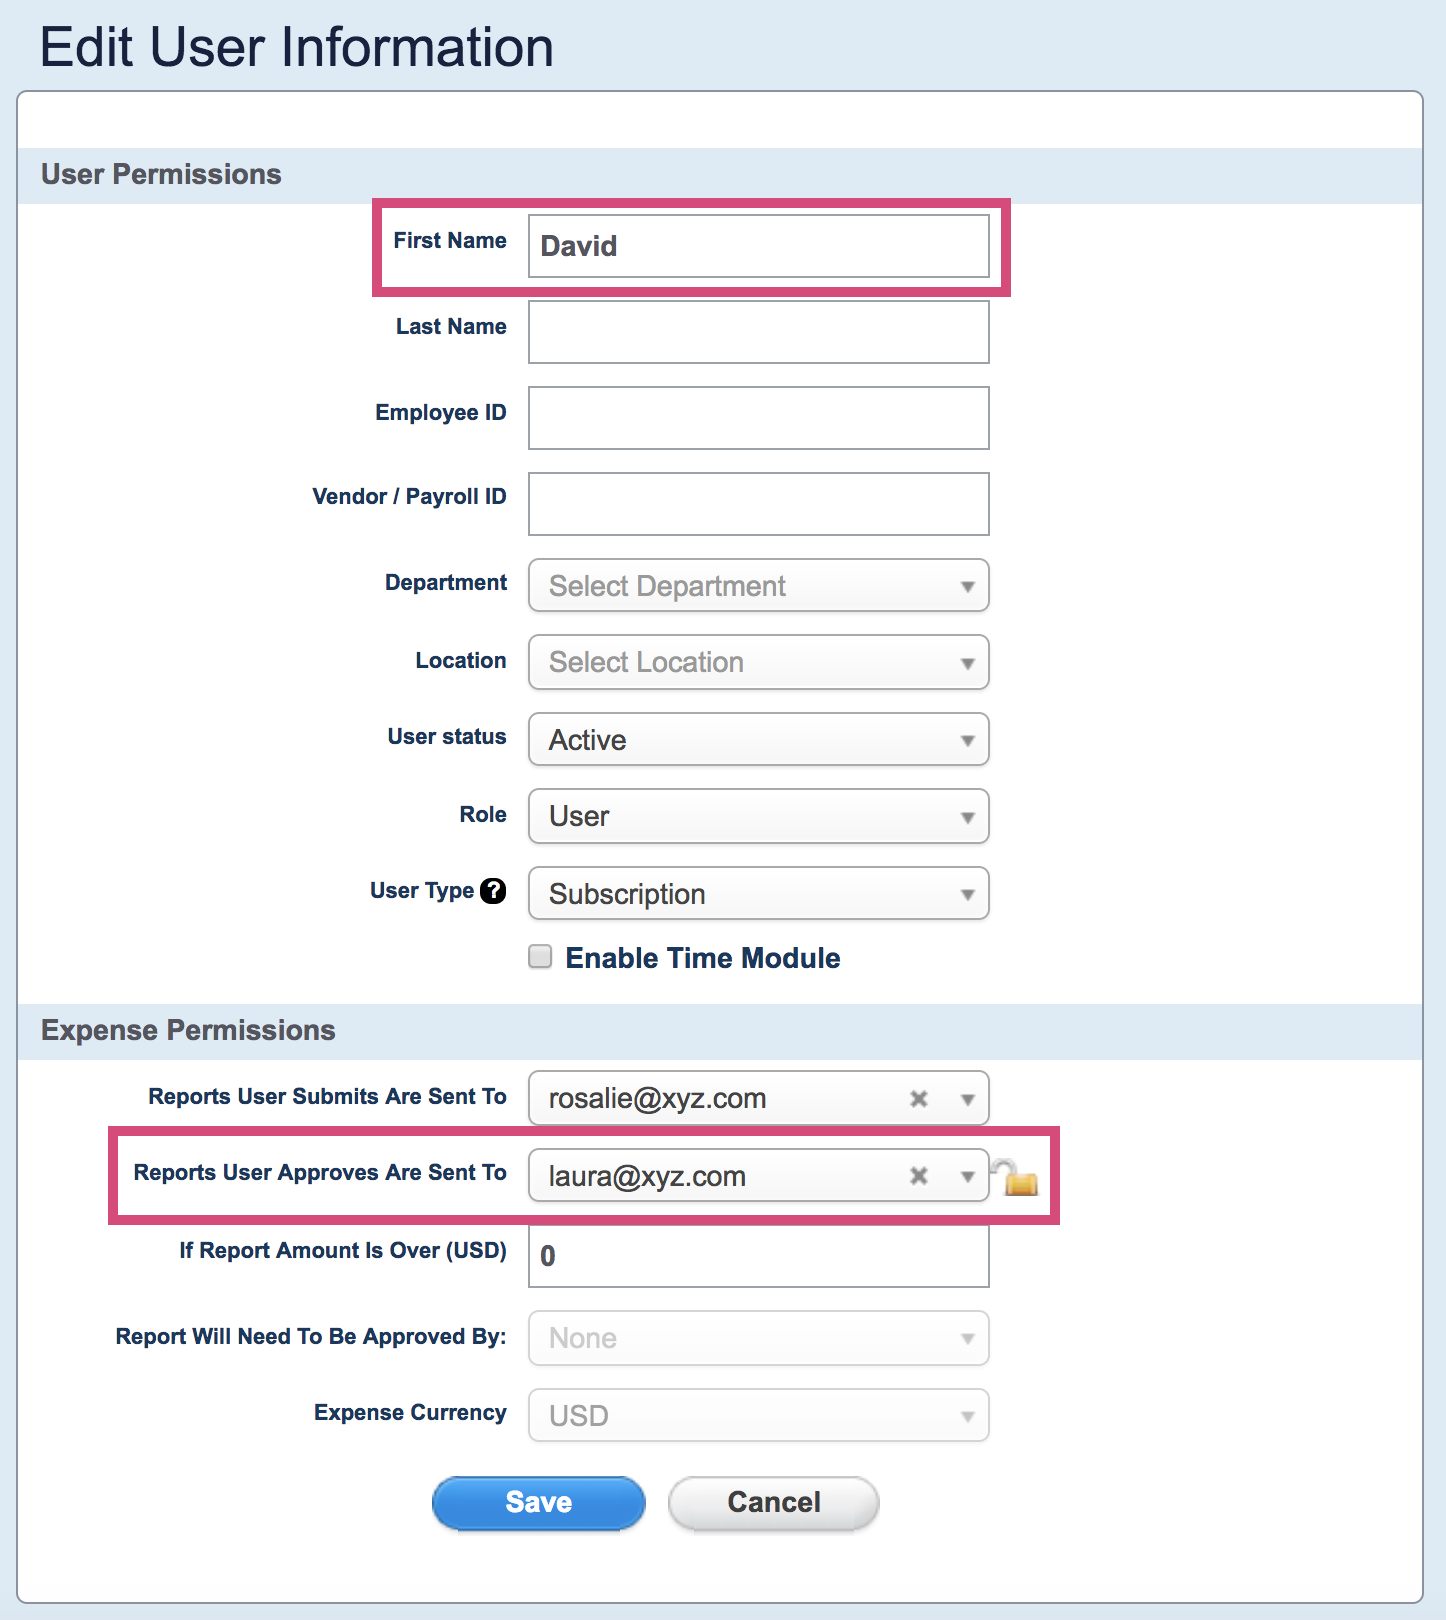
3. After David is done approving the reports, they must be sent to Laura for final approval. In this scenario, David's user settings are as follows:
View 1 = Laura needs to be selected under the Approves To column.
View 2 = Laura needs to be selected for the field Reports User Approves Are Sent To.
4. Laura is the last and final approver, for her settings the Reports User Approves Are Sent To field must be blank.
If a user is setup as their own "Next Approver", all approved reports will still be shown as pending after approval.
"One-Click Approval" Feature
"One-Click Approval" = the report is automatically sent to the next approver once the first approver clicks the Approve button.
If "One-Click Approval" is not enabled, then the approvers will need click Approve and then click Submit to send the report to the next approver.
To enable one click approval, go to Settings > Company Settings > Check box "Enable One-Click Approval" > Save.

Note: that this feature only works when multiple approvers are set up.
"Allow User Role to Setup Bookkeeper" Feature
Majority of companies submit to approvers who then submit to another approver or bookkeeper. Some of our customers would like to give their users the ability to setup a bookkeeper. The user permission "Allow User Role to Setup Bookkeeper" gives employees with the user role the ability to setup a bookkeeper and submit a report directly to the bookkeeper to bypass the approval process. When a report is submitted directly to a bookkeeper, the report is immediately marked as approved essentially bypassing the approval process.
To enable this user permission, please go to Settings > Company Settings > Check box "Allow User Role to Setup Bookkeeper" > Save.
