As a TriNet client, you and your worksite employees are offered the convenience of using Single-Sign On (SSO) directly from your TriNet account to your TriNet Expense Management account.
When accessing TriNet Expense Management, you will be logged into the account matching the work email address that is setup in your TriNet account.
To access TriNet Expense Management, continue with the instructions below.
- Login to the TriNet
- Your TriNet account will automatically default to Employee View.
- Note: If you have administrative access to TriNet for your company, you may need to change your view to Employee in the upper left corner of your account.
- In the left menu bar, click Money then select Expenses
You will be redirected to your TriNet Expense Management account.
- Note: Once you have completed the SSO from the TriNet platform, your payroll integration is complete.
If you have any questions, log in to TriNet (login.TriNet.com) and click Contact TriNet. *
*If you are unable to log in, go to TriNet (login.TriNet.com) and select one of the following options: Forgot Password, Forgot ID, Unlock Account, Login Help.
TriNet Expense Management supports the ability to add custom categories. The following explains the several ways you can add a category:
Categories are classification within TriNet Expense Management for expenses items to be listed under. Categories (or Chart of Accounts) can be manually entered in or imported from third party applications like NetSuite, Intacct, and QuickBooks Online. Please refer to the helpful topic Importing Categories From 3rd Party Applications for details on how to do this.
Each category has attributes, and a broader system category called an expense type. Choose the expense type which best matches your category, this will improve the analytics and help us categorize imported expenses.
Each expense type is required to have 1 default category, you can reassign or edit this category if you'd like. Example is Mileage - You can have many different mileage categories, but one needs to be considered a default and existing within your list of categories.
Adding From The Settings Tab
If you have setup a Company and want to change the categories for all users (Admin Role only), go to the Settings > Company Settings >Categories
If you have not setup a Company and want to change the categories your own user account, go to the Settings > Personal Settings >Categories
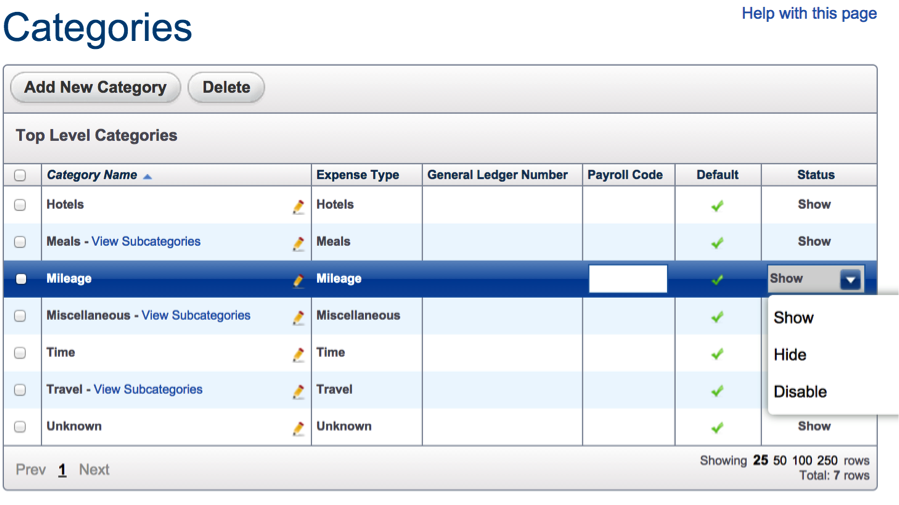
Your account has been setup with sample categories (including sub-categories). You can delete any of these categories by simply selecting the row(s) and the Delete button.
*Please remember there must be a category for each default expense type (example: Unknown, Mileage)
1) To add a new category, simply select the Add New button. A box will appear allowing you to enter in the category name and select the expense type is pertains too. You can also add additional fields to track for that category by selecting the check box. If the catogory is the default expense type, select the "Set as default for expense type" check box. 
2) To add a sub-category, select the add new button and select a parent category. It will add that category as a child to the parent category.

3) Add a General Ledger Number to a category. The GL Number will be displayed as a column when exporting a CSV report (Detail CSV option only). This is beneficial for companies who are unable to integrate with the accounting software we offer.

4) Show, Hide, or Disable your customized categories from users (Owner and Admin role only). By changing a category from Show to Hide, the category or sub-category will be hidden from users in the company. Select Disable (parent categories only) to show the parent category, but not allow for the parent category to be selected. To change a categories’ status, double-click on the category line and select the down arrow under the Status column.

Adding From The Expense Tab
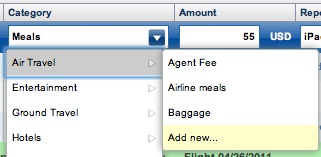
1. Go to the Expenses >Active page.
2. Select an expense row and down arrow in the category column.
3. Select the master category you wish to add under (ie. Hotel, Meals) and the ADD NEW link

4. A box will appear. Enter any custom categories under the Your Category section.
Adding Categories For An Entire Company
If you are the administrator of a company, any category entered in will instantly be accessible by all users associated with the account. This includes categories displayed on TriNet Expense Management's mobile applications.
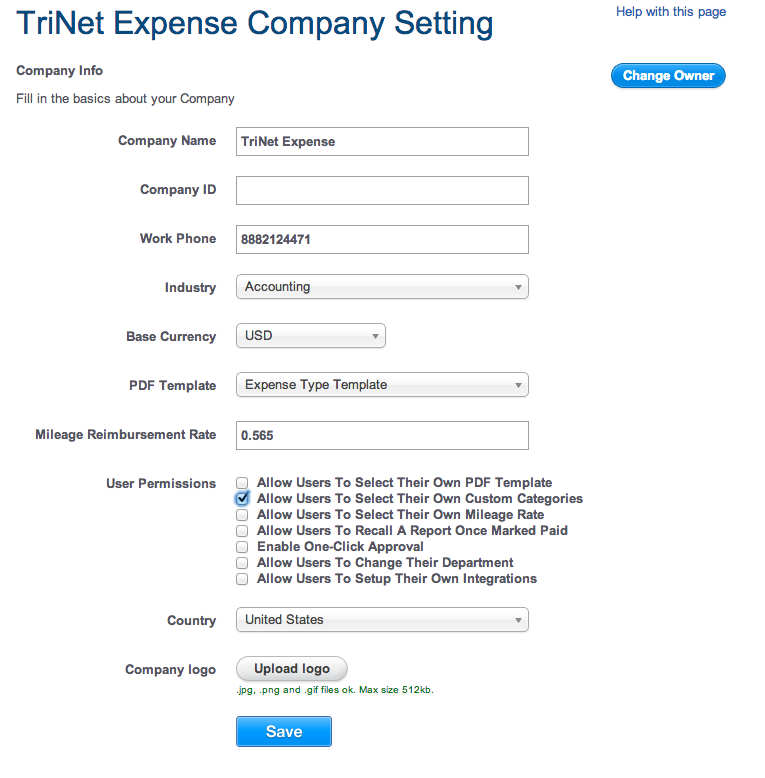
Depending on the permission set by your company, you may not be able to add, edit or delete your categories.
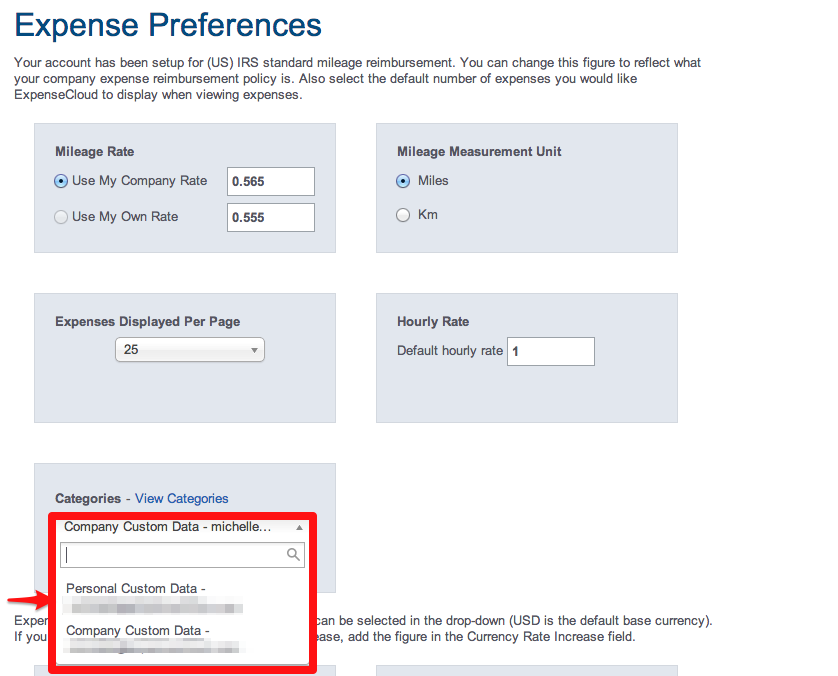
If the company owner or admin allow users to select their own custom categories, then the users will need to select their categories in Settings > Personal Settings > Expenses. There will be a drop-down list for the user to select the company or personal categories list to be shown on the “Active Expenses.”

