As a TriNet client, you and your worksite employees are offered the convenience of using Single-Sign On (SSO) directly from your TriNet account to your TriNet Expense Management account.
When accessing TriNet Expense Management, you will be logged into the account matching the work email address that is setup in your TriNet account.
To access TriNet Expense Management, continue with the instructions below.
- Login to the TriNet
- Your TriNet account will automatically default to Employee View.
- Note: If you have administrative access to TriNet for your company, you may need to change your view to Employee in the upper left corner of your account.
- In the left menu bar, click Money then select Expenses
You will be redirected to your TriNet Expense Management account.
- Note: Once you have completed the SSO from the TriNet platform, your payroll integration is complete.
If you have any questions, log in to TriNet (login.TriNet.com) and click Contact TriNet. *
*If you are unable to log in, go to TriNet (login.TriNet.com) and select one of the following options: Forgot Password, Forgot ID, Unlock Account, Login Help.
TriNet Expense supports sending employee expense reports to NetSuite:
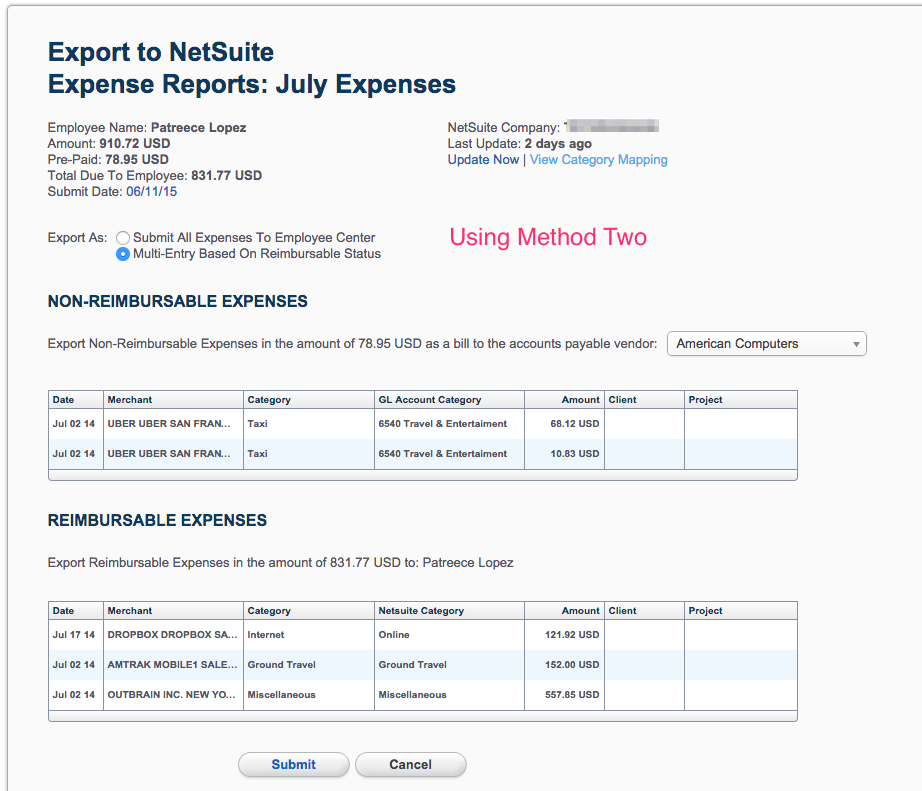
Allowing you the ability to submit approved expenses from TriNet Expense into NetSuite's Employee Center or Accounts Payable.
Expense reports can be exported to NetSuite Employee Center by clicking the Submit button directly within an expense report. They can also be submitted via our mobile iPhone and Android apps (Quick Guide to NetSuite for TriNet Expense). Non-reimbursable expenses can be sent to the Accounts Payable module, creating a bill to the vendor you choose or sent to Employee Center, displayed with the reimbursable expenses. The total amount of the non-reimbursable expenses sent to Employee Center will be displayed in the Advance amount field.

Once the expense report is submitted from TriNet Expense it will be displayed in the user's NetSuite account, including the digital receipts. The report is automatically submitted for approval within NetSuite (Using Method One). Using Method Two, the reports will show both accounting and supervisor approval.
Additionally, TriNet Expense will send a PDF copy of the NetSuite template along with all the digital receipts. This email is sent to the user and any approvers they have added during the setup.
* Users can select the NetSuite Department, Location and Class at each expense line item in TriNet Expense. If the users does not select the Employee, Department and Class fields, TriNet Expense will automatically use the default value in NetSuite in the user's account. Additionally, non-reimbursable expenses sent to accounts payable as a Bill will show the employee submitting the expense report department and location.
Using Method Two, the Account Approval checkbox will automatically be checked once submitted to NetSuite Employee Center. The Supervisor Approval checkbox will also be checked if the user (report submitter) has a supervisor listed in their NetSuite employee profile.
To learn more about mapping NetSuite Chart of Accounts (categories) with TriNet Expense categories can be found here.
Receipt Images - To view receipt images for the expense report, select the History tab > File tab.

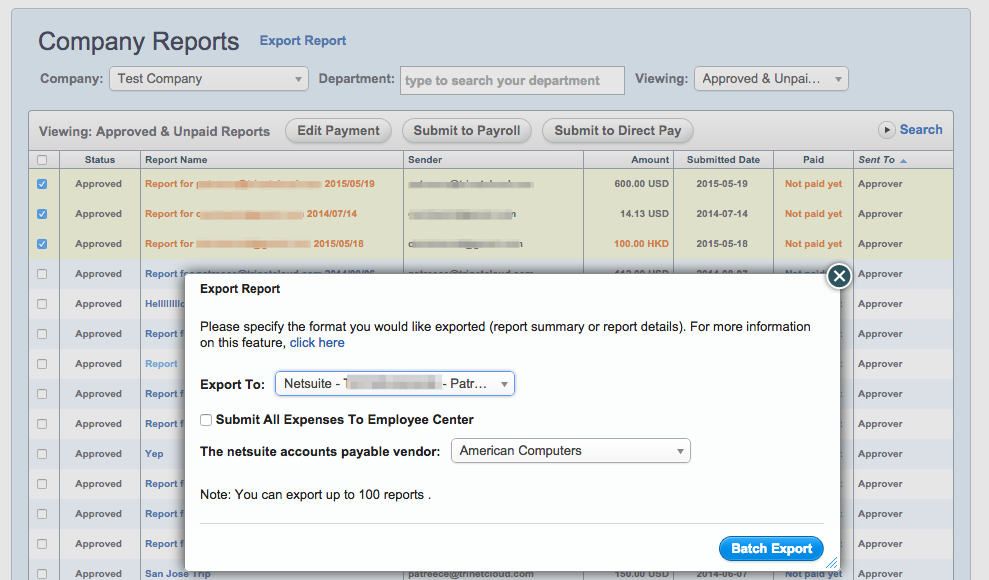
TriNet Expense offers the ability to batch export (sending multiple expense reports at once)
When viewing Company Reports, Select the multiple reports to batch export, Click Export Report and Choose Export To: NetSuite.
