Overview
Employee Import is a helpful, time-saving tool that uploads your employees all at one time rather than having to enter them one-by-one. It is important to understand all of the requirements to ensure a successful upload.
Requirements
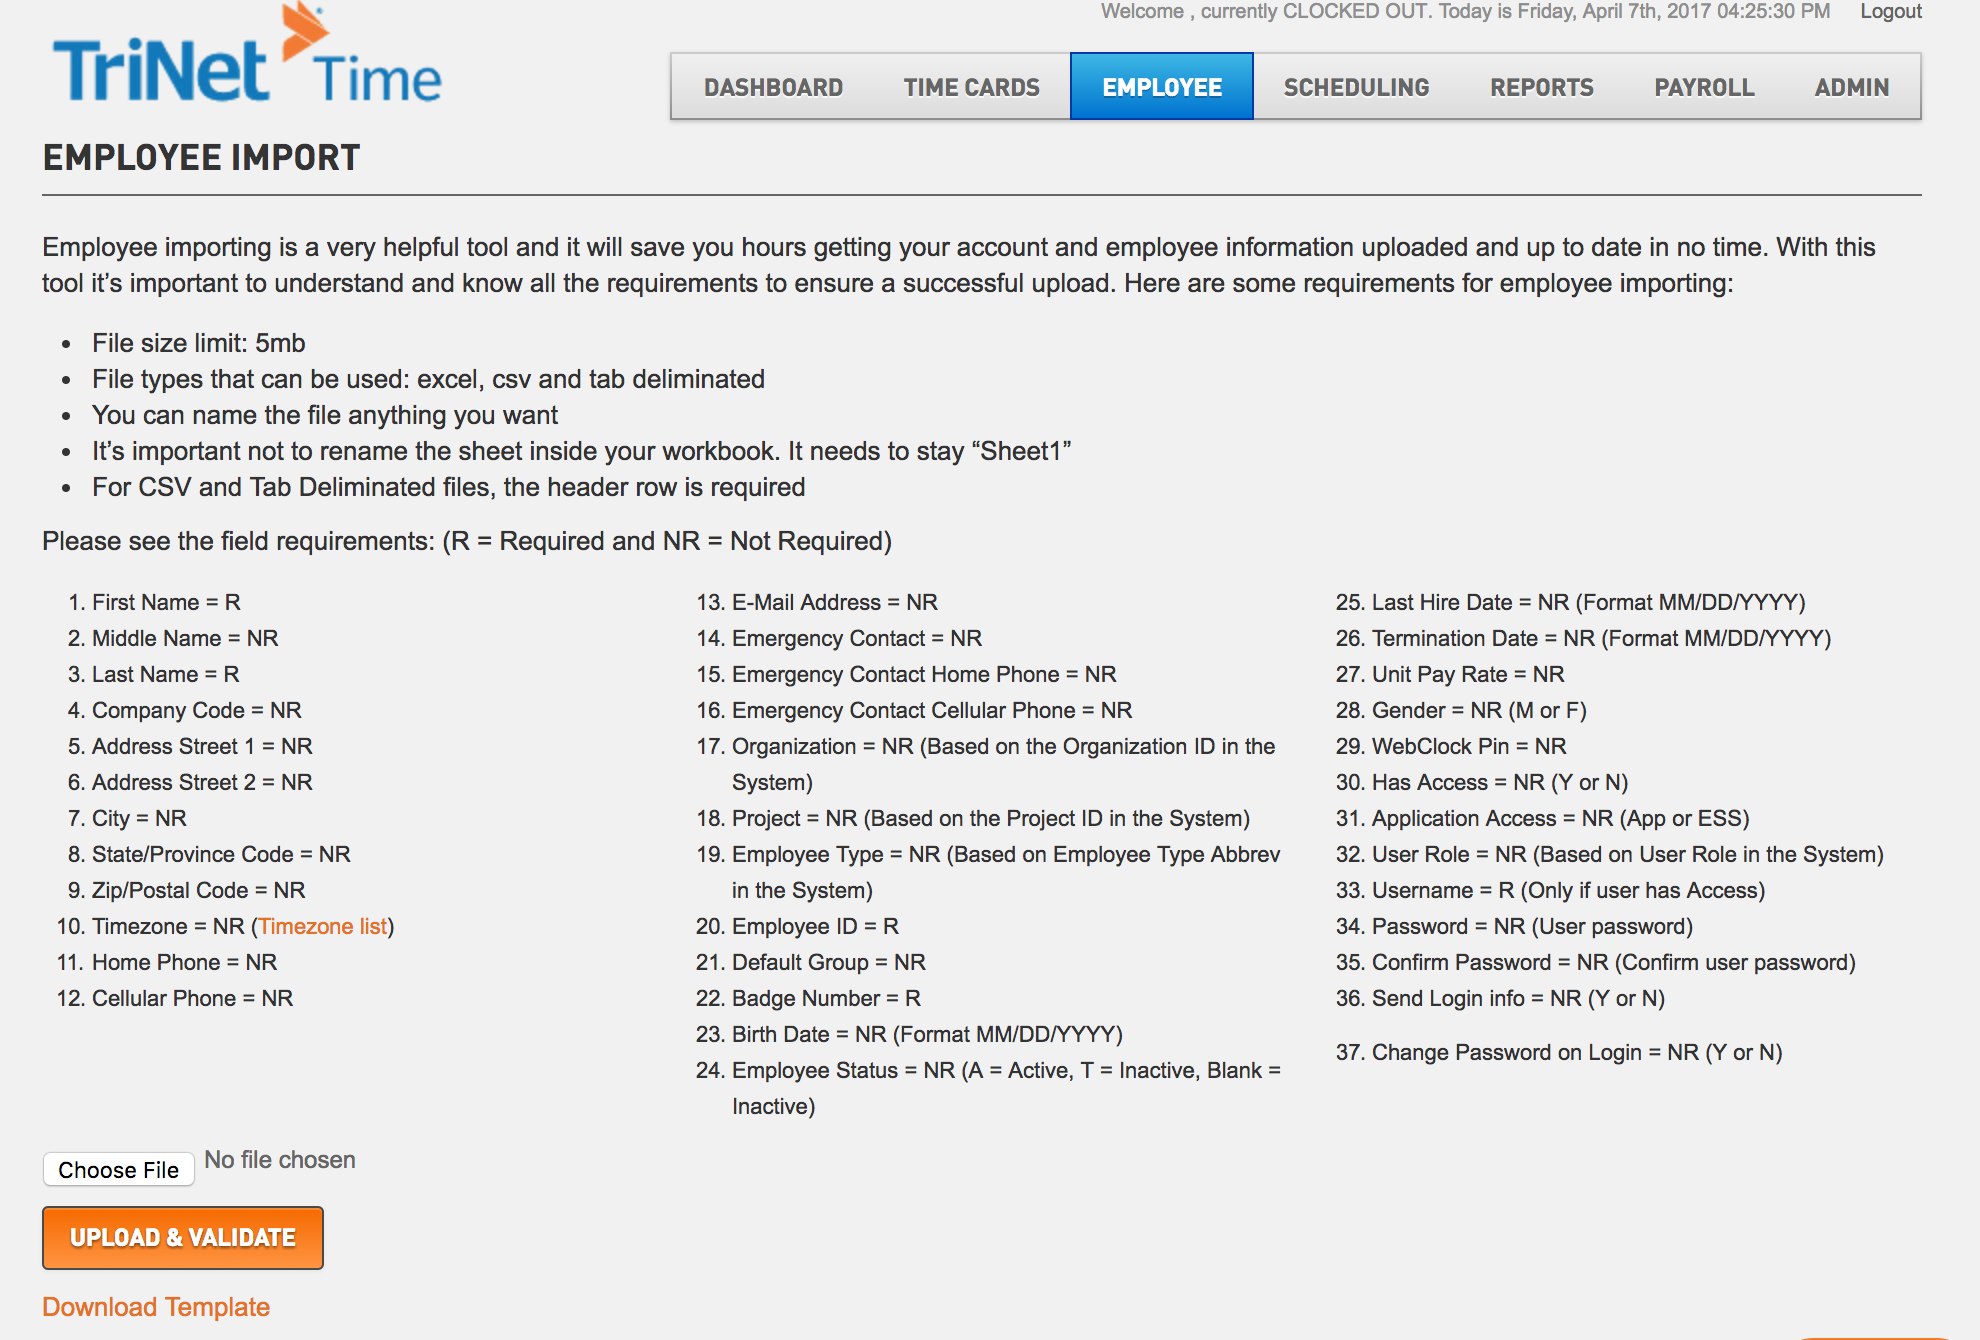
· File size limit: 5mb
· File types that can be used: Excel, CSV and Tab Delimited
· You can name the file anything you want.
· It is important not to rename the sheet inside your workbook. It should stay “Sheet1”
· For CSV and Tab Delimited files, the header row is required.
· Please see the field requirements: (R = Required, NR = Not Required)
- First Name = R
- Middle Name = NR
- Last Name = R
- Company Code = NR
- Address Street
- Address Street 2 = NR
- City = NR
- State/Province Code = NR
- Zip/Postal Code = NR
- Timezone = NR
- Home Phone = NR
- Cellular Phone = NR
- E-Mail Address = R (Only if user has Access)
- Emergency Contact = NR
- Emergency Contact Home Phone = NR
- Emergency Contact Cellular Phone = NR
- Organization = NR (Organization ID in the System)
- Project = NR (Project ID in the System)
- Employee Type = NR (Used abbrev in the System)
- Employee ID = R
- Default Group = NR
- Badge Number = R
- Birth Date = NR (Format MM/DD/YYYY)
- Employee Status = NR (A = Active, T = Inactive, Blank = Inactive)
- Last Hire Date = NR (Format MM/DD/YYYY)
- Termination Date = NR (Format MM/DD/YYYY)
- Unit Pay Rate = NR
- Gender = NR (M or F)
- WebClock Pin = NR
- Has Access = NR (Y or N) - If selecting "Y", the system will create an empty user account for the employee. You can edit and assign a user role to this employee later in the system.
Instructions
Step 1
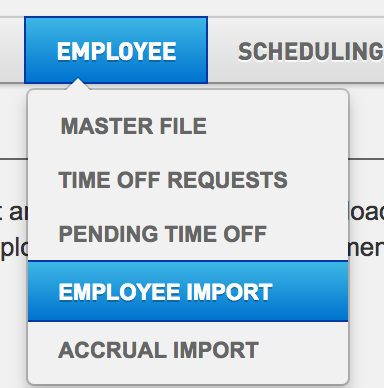
In the Time toolbar, go to “Employee” and select Employee Import.

Step 2
On the Employee Import Screen, begin by downloading a template ![]() . This template contains all of the available fields the system supports and it is in an acceptable format.
. This template contains all of the available fields the system supports and it is in an acceptable format.
Although the default format of the template is “xls”, the system allows CSV (Comma Delimited) as well as Text (Tab Delimited).

Step 3
Complete the spread sheet with the employee information to upload into the system.
The required fields are:
First name, Last Name, Email Address, Employee ID and Badge Number.
The remaining fields are additional fields of information that you can add now or add later.
The more information you add now, the less you would need to enter later.
The email address is not necessary if the user is not going to log in.
The Employee ID must be unique.

Step 4
Save your file in any of the following formats:
XLS
CSV
Tab Delimited
Note: Do not leave required fields blank.

Step 5
Upload your spread sheet by clicking the “Choose File” button.
Select your saved file.
Click the "Upload & Validate" button.

Step 6
After clicking the “Upload & Validate” button, the system will upload all the data to be reviewed and validated.

The information in the import file will display in the following three categories that can be seen as headers above:
New Employees - new employee information not previously uploaded.
Updated Employees - an existing employee with new information.
Invalid Employees - any employees with errors or missing fields
If revisions need to be made to this file, select the “Different File” button.
This will cancel the upload and allow you to make revisions to resend the file.
Step 7
When the file is correct and ready to be imported, click the “Accept Changes And Import” button.
Summary
The Employee Import can also be used to update your employee information at any time. For example, if the company email addresses change for all of your existing employees, you could update the file with all of the new email addresses and use the Employee Import feature as a mass update feature, saving yourself a lot of time.